

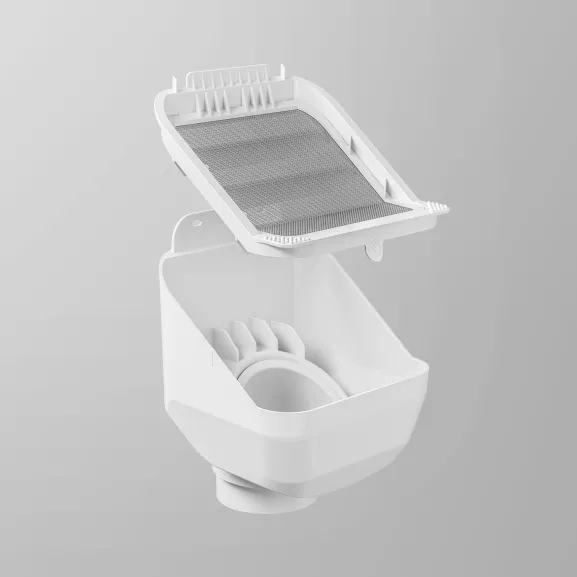
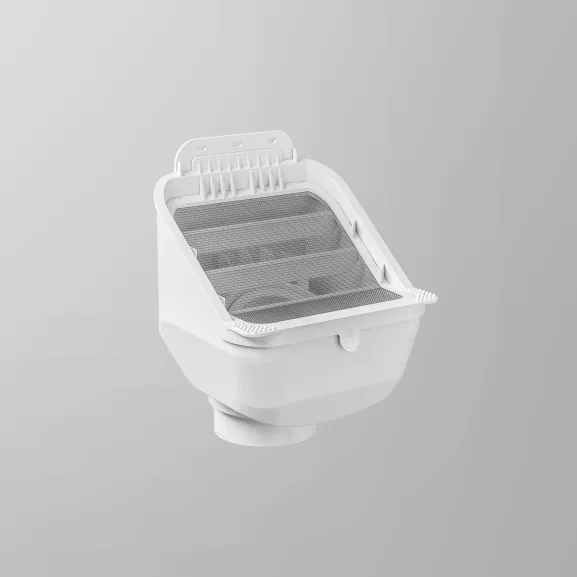
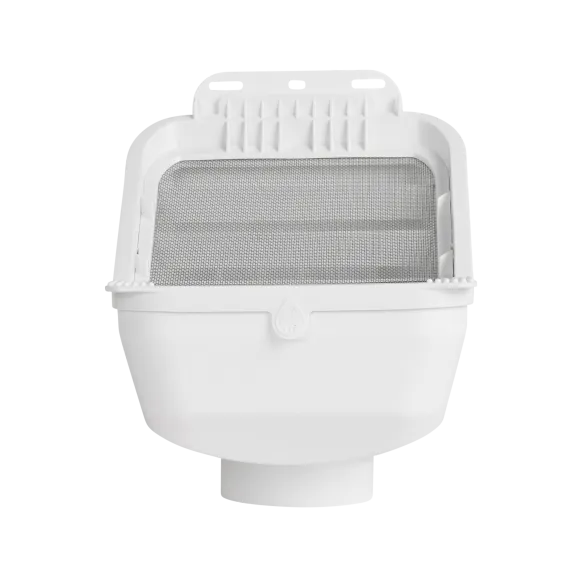
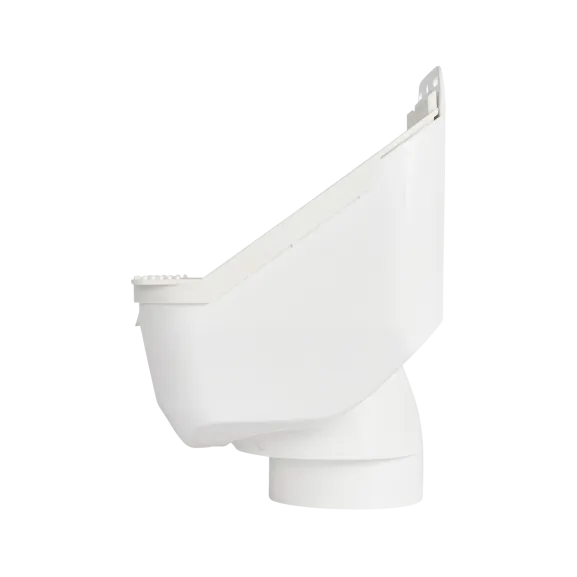
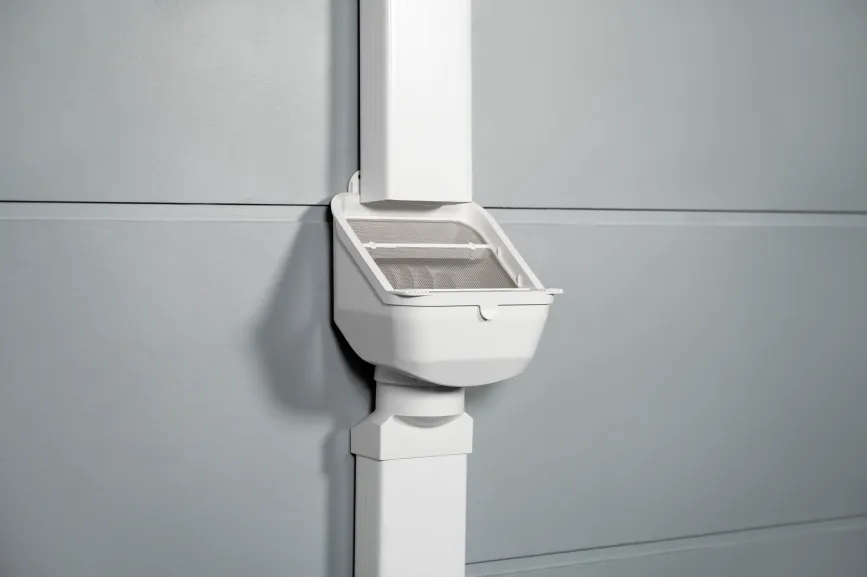
Leaf Eater® Advanced
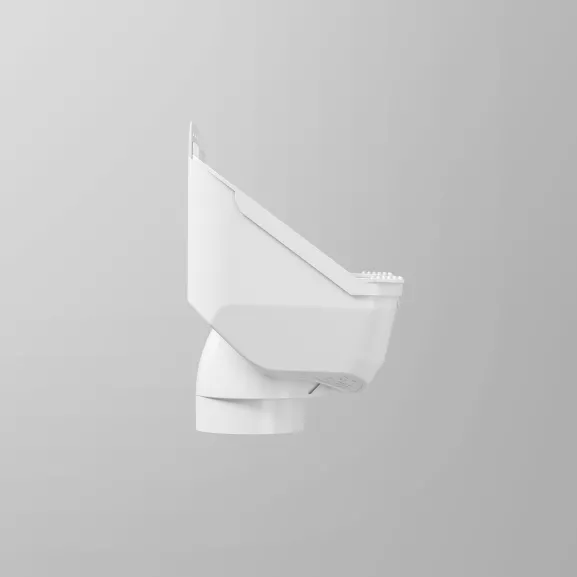
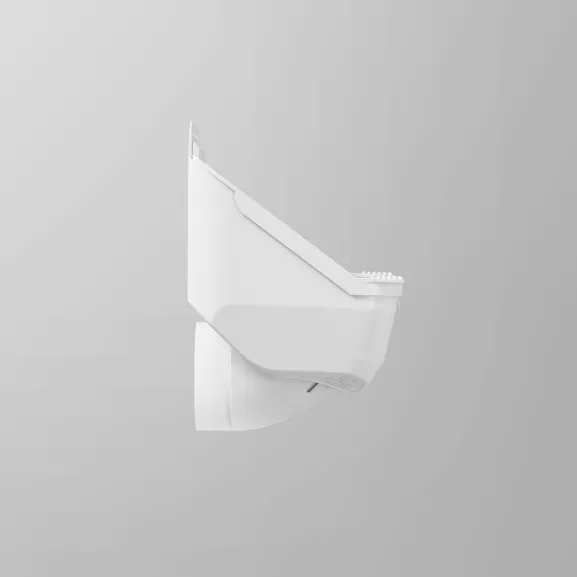
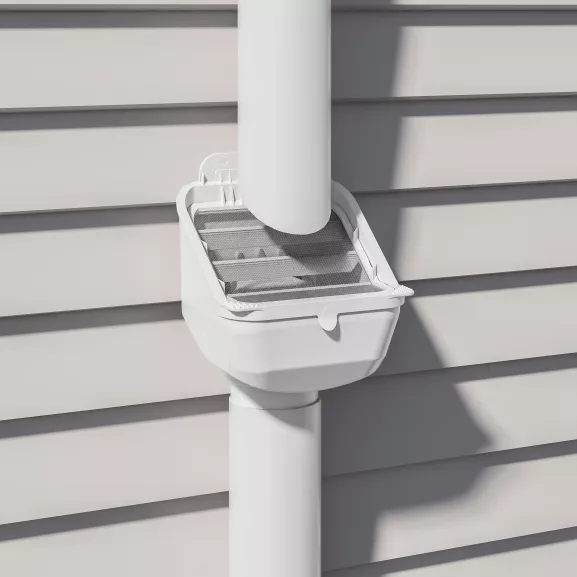
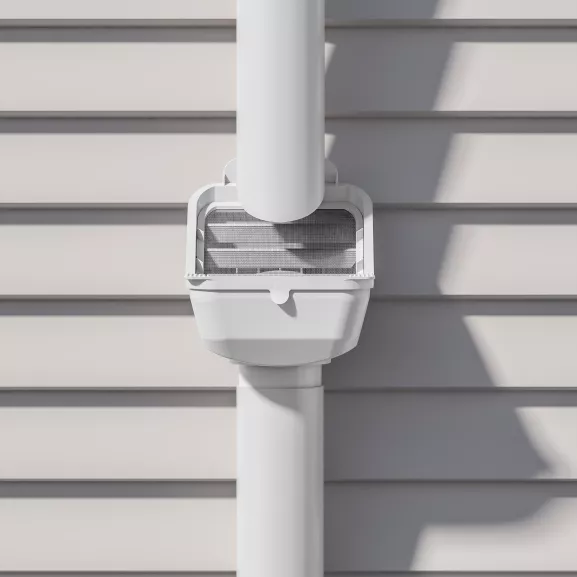
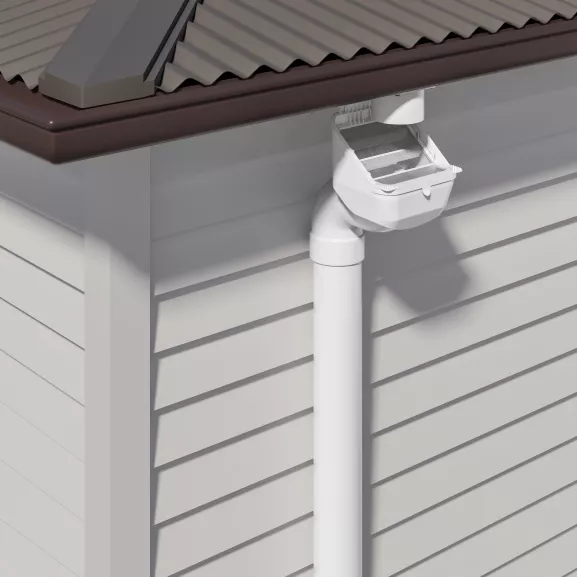
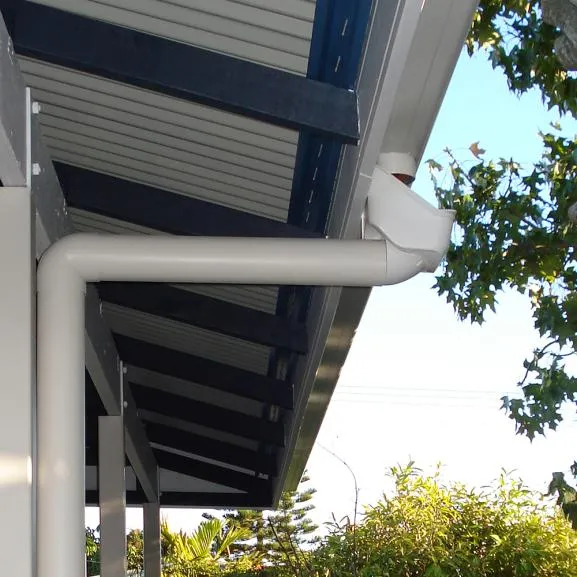
The compact size of the Leaf Eater® Advanced allows it to squeeze into small spaces. Its swivelling base allows even more installation flexibility, allowing you to mount it easily to horizontal or vertical pipes.
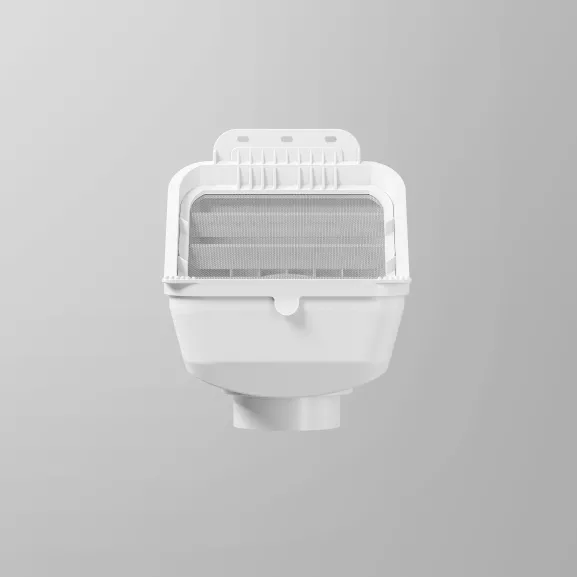
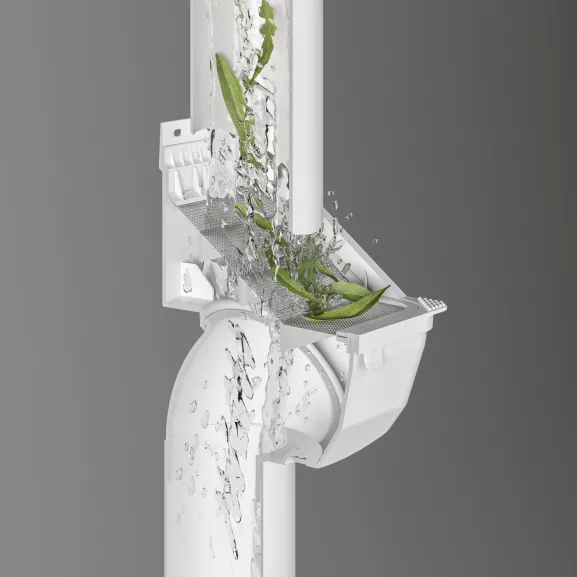
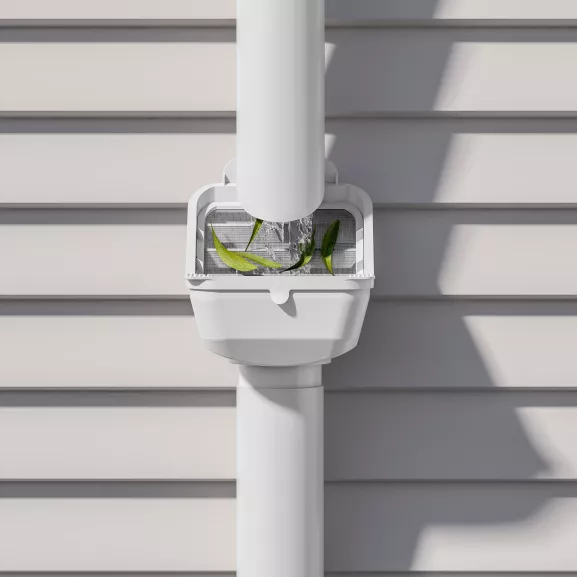
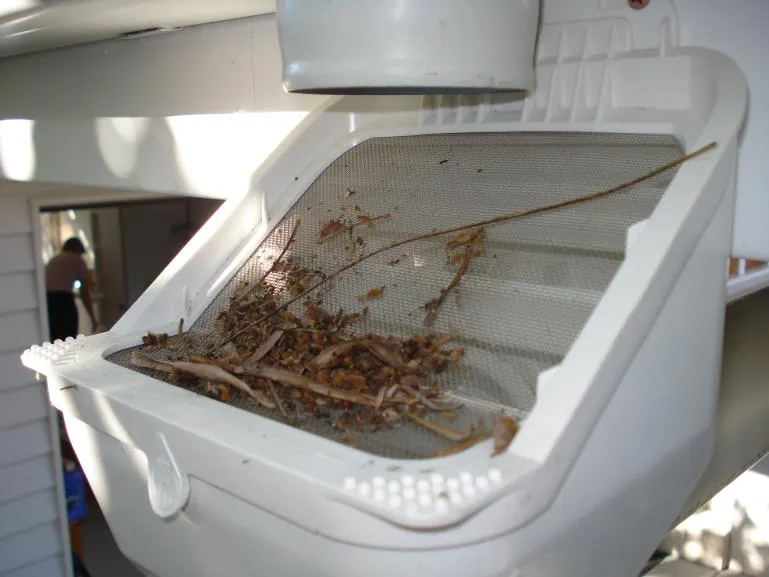
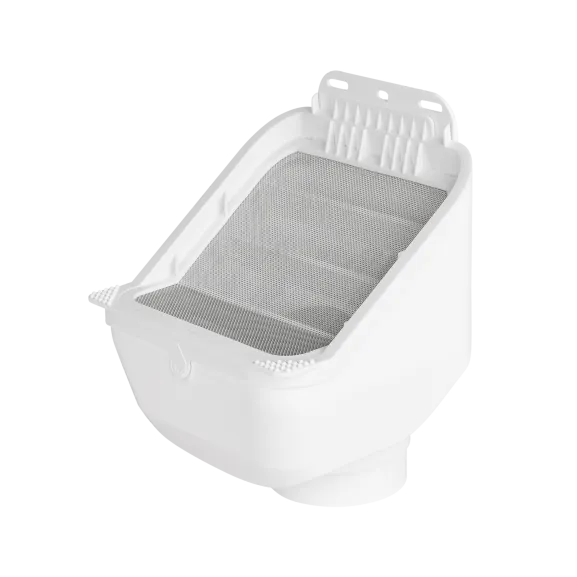
Like all rain heads, it improves your water quality by filtering out leaves and debris with it's fine, mesh screen.
Compact Design
Cleaner rainwater
Keep out mosquitoes
Pivoting base outlet
Minimal maintenance
Benefits
Compact design
Thanks to its compact size and patented swivelling VH Pivot™, the Leaf Eater® Advanced can be installed in places where larger rain heads won’t fit. This lets you filter leaves and debris before they enter your downpipes no matter what shape your gutters, eaves and roof may be.
Benefits
Capture cleaner water
The 955 micron (0.955mm), stainless steel mesh screen prevents leaves, mosquitoes, and other pests from entering your downpipes and rainwater system. It's a fundamental step in cleaning your water to give you the best rainwater supply possible.
Benefits
Minimal maintenance
The angled mesh screen allows leaves to slide off easily, which means less maintenance. It makes it easier for you to capture high volumes of great quality rainwater.
Benefits
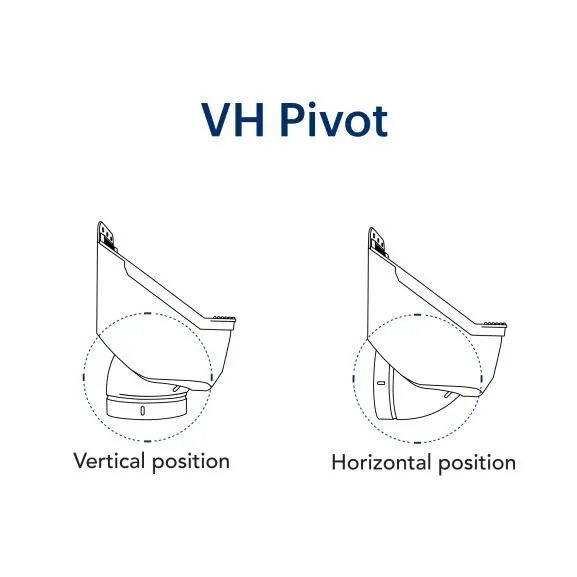
Rain Harvesting’s patented VH Pivot™
This Rain Head incorporates a VH Pivot™ outlet that swivels to suit vertical or horizontal downpipes. Pivot the outlet to suit vertical or horizontal (rear outlet) downpipes enabling a variety of installation options in one product, for instance in a tight space under a low-set fascia.
Benefits
Compact design
Thanks to its compact size and patented swivelling VH Pivot™, the Leaf Eater® Advanced can be installed in places where larger rain heads won’t fit. This lets you filter leaves and debris before they enter your downpipes no matter what shape your gutters, eaves and roof may be.
Benefits
Capture cleaner water
The 955 micron (0.955mm), stainless steel mesh screen prevents leaves, mosquitoes, and other pests from entering your downpipes and rainwater system. It's a fundamental step in cleaning your water to give you the best rainwater supply possible.
Benefits
Minimal maintenance
The angled mesh screen allows leaves to slide off easily, which means less maintenance. It makes it easier for you to capture high volumes of great quality rainwater.
Benefits
Rain Harvesting’s patented VH Pivot™
This Rain Head incorporates a VH Pivot™ outlet that swivels to suit vertical or horizontal downpipes. Pivot the outlet to suit vertical or horizontal (rear outlet) downpipes enabling a variety of installation options in one product, for instance in a tight space under a low-set fascia.
Product Installation, Maintenance and Information
Specifications
All measurements are in mm unless specified otherwise
Click the drawing to view it in full size
Pipe Fitment
You may also like
We’re sorry, the product you are looking for is not available in this region. Click here to view all available products for this region.
If you need help, please contact our team who will be glad to assist.
Looking for something else?
View the full product range from our home base in Australia.
Rain Harvesting™ Handbook
A guide that will provide you with help and inspiration to start your rainwater harvesting journey today.

Design Service
Improve your existing Rain Harvesting™ system or design a new one with the help of our experts and our free system design service.